
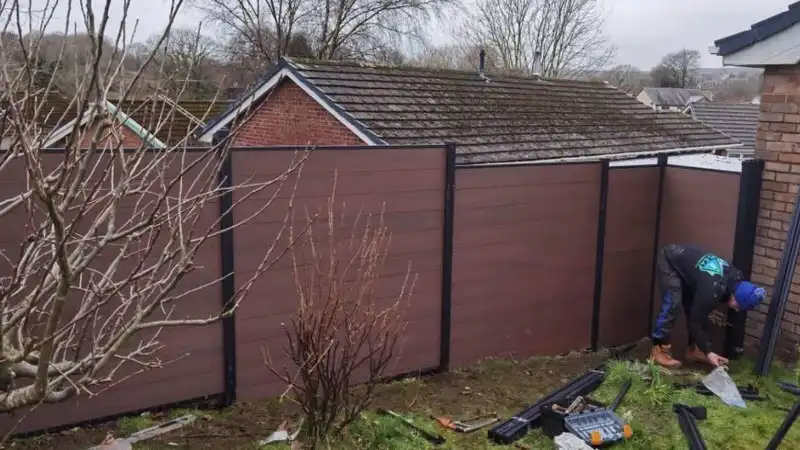
Installing composite fencing is relatively straightforward when you have the right panels, posts, and installation instructions. However, incorrect post spacing, unsuitable foundations, or insufficient expansion gaps can create problems that are difficult to correct once the fence is installed.
This guide explains how to install composite fencing, from planning and setting posts to fitting WPC boards and handling slopes or gates. It also covers practical installation details that contractors and project buyers should check before starting work.
Whether you are installing a residential privacy fence or managing a larger fencing project, getting these details right can help reduce installation time and unnecessary rework.
1. Is Composite Fencing Easy to Install?
Composite fencing is generally easier to install than traditional timber fencing when using a compatible modular system.
Most modern WPC composite fence panels use an interlocking or slot-in design. The boards fit into channels within aluminium or other compatible posts, reducing the amount of cutting and assembly work required on-site.
However, easy assembly does not mean every installation is simple. Ground conditions, post alignment, fence height, and wind exposure still require careful planning.
Why Composite Fence Systems Are Easier to Assemble
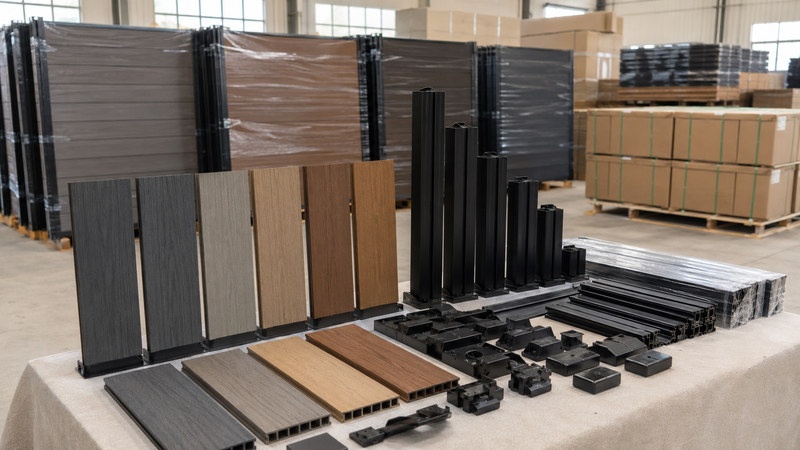
A typical composite fencing system includes:
- WPC composite fence boards
- Aluminium fence posts
- Bottom and top rails
- Post caps
- Fixings and installation accessories
- Optional matching gates
Instead of building each panel from individual timber components, installers can assemble the boards within a prepared post system.
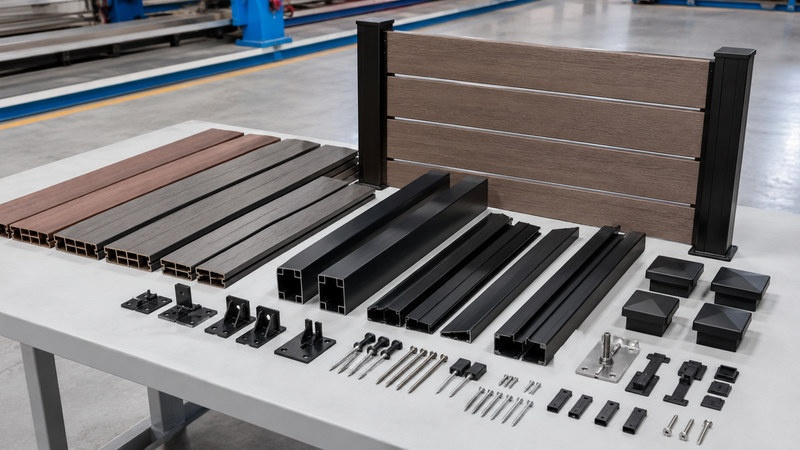
JZH Fence supplies composite fencing systems with compatible aluminium posts and installation accessories. You can learn more about the materials and structural components in our composite material fence guide.
DIY Installation vs Professional Installation
A straightforward composite fence installation may be suitable for experienced DIY installers, particularly when the ground is level and the fence follows a straight boundary.
Professional installation is recommended when the project involves:
- Long commercial fence runs
- Uneven or sloping ground
- High-wind locations
- Heavy or frequently used gates
- Complex corners or changes in direction
- Foundations requiring structural assessment
For contractors and project buyers, the important point is to confirm the installation method before ordering the complete fencing system.
2. Plan Your Composite Fence Installation
Good planning can prevent problems later in the installation process.
Before you start digging post holes or drilling into concrete, measure the fence line and confirm the dimensions of the fence panels and posts.
Measure the Fence Line and Calculate Materials
Start by measuring the total length of the planned fence.
Mark the position of each corner, gate, and change in direction. If the site is sloping, record the changes in ground level as well.
A simple project drawing should show:
- Total fence length
- Required fence height
- Number and position of gates
- Corner and end-post locations
- Ground conditions
- Any changes in elevation
These measurements will help your supplier calculate the number of panels, posts, rails, and accessories required.
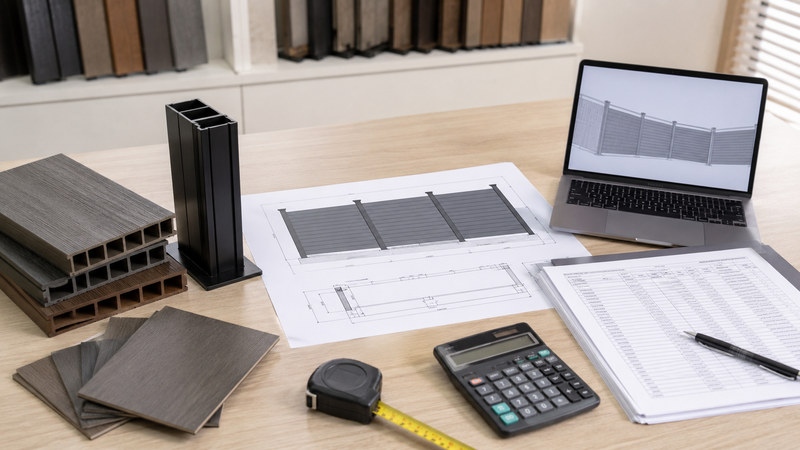
For larger orders, it is better to request a complete bill of materials instead of purchasing boards separately.
Our composite fence panels import guide explains what distributors and contractors should confirm when ordering complete fencing systems.
Choose the Right Fence Height and Panel Size
Composite fencing is available in different heights and panel configurations.
A height of approximately 1.8m is common for residential privacy fencing, although actual requirements vary by location and application.
| Application | Typical Height for Initial Planning |
|---|---|
| Decorative boundary | Around 1.2m |
| Residential privacy fence | Around 1.8m |
| Commercial boundary | 2.0–2.4m, subject to design requirements |
These are general planning references rather than universal installation standards.
For JZH Fence composite systems, a standard 1.8m-high configuration may use approximately 11 horizontal boards, depending on the selected board profile and effective coverage.
Always confirm the exact number of boards and overall finished height using the product drawing.
Check Local Regulations and Property Boundaries
Before installing composite fencing, check local planning rules and property boundaries.
Permitted fence heights can vary depending on whether the fence faces a road, separates neighbouring properties, or forms part of a commercial site.
For example, in England, the Planning Portal guidance on fences, gates and garden walls explains that planning permission may be needed above 2m, or above 1m next to a highway used by vehicles (including its footpath). Listed buildings, planning conditions, and other restrictions can also affect permission requirements.
In the United States and Canada, requirements can vary by municipality, zoning district, and homeowners’ association.
Do not assume the same installation rules apply across different markets.
Confirm Post Spacing and Gate Locations
Post spacing is one of the most important measurements in composite fence installation.
The distance between posts needs to match the actual board dimensions, installation channels, and required expansion allowance.
Do not assume the nominal panel width is the correct centre-to-centre post spacing.
For example, a composite panel described as approximately 1.8m wide does not necessarily require posts positioned exactly 1,800mm apart from centre to centre.
The final spacing depends on the post profile and the way the boards fit into the channels.
Confirm this dimension using the manufacturer’s installation drawing before setting the posts permanently.
3. Tools and Materials Needed for Composite Fence Installation
You can install many composite fencing systems using standard construction tools.
Having everything ready before starting helps avoid delays once the posts are positioned.
Essential Installation Tools
| Tool | Purpose |
|---|---|
| Tape measure | Measure fence length and post spacing |
| Spirit level | Check post and panel alignment |
| String line | Keep the fence line straight |
| Post-hole digger | Prepare holes for in-ground posts |
| Drill or hammer drill | Install fixings and concrete anchors |
| Rubber mallet | Assist with panel positioning |
| Fine-tooth saw | Cut compatible composite boards |
| Safety equipment | Protect hands, eyes, hearing, and breathing |
Use appropriate personal protective equipment when cutting or drilling.
Before any excavation, identify buried utilities and follow local procedures for locating underground services.
For projects in the United States, use the 811 Before You Dig service before digging fence-post holes, wait the required time, and confirm that all utilities have responded before excavation.
Composite Fence Panels, Posts, and Accessories
A complete composite fence installation requires more than just WPC boards.
The boards must be compatible with the posts, channels, rails, and fixings.
At JZH Fence, our composite fencing systems commonly use powder-coated aluminium posts.
Available post options include:
- 70 × 70mm aluminium posts
- 80 × 80mm aluminium posts
- 1.4mm nominal wall thickness, depending on the selected specification
These are product options, not universal structural recommendations.
The appropriate post size, wall thickness, and fixing method must be checked against the fence height, panel dimensions, wind exposure, and project requirements.
Why Compatible Components Matter
Buying boards and posts from different suppliers may appear convenient, but it can cause installation problems when the profiles do not match.
For example, the board thickness may not fit the post channel, or the top rail may not connect properly.
Before ordering, confirm that the supplier can provide a matched set of boards, posts, rails, caps, and installation accessories.
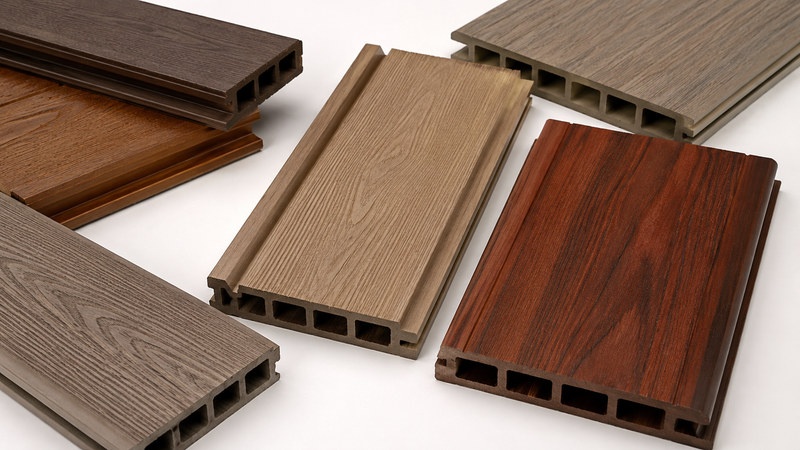
4. How to Install Composite Fence Posts
Correctly installed posts provide the foundation for the entire fence.
If the posts are incorrectly spaced or installed out of alignment, the composite boards may not fit properly.
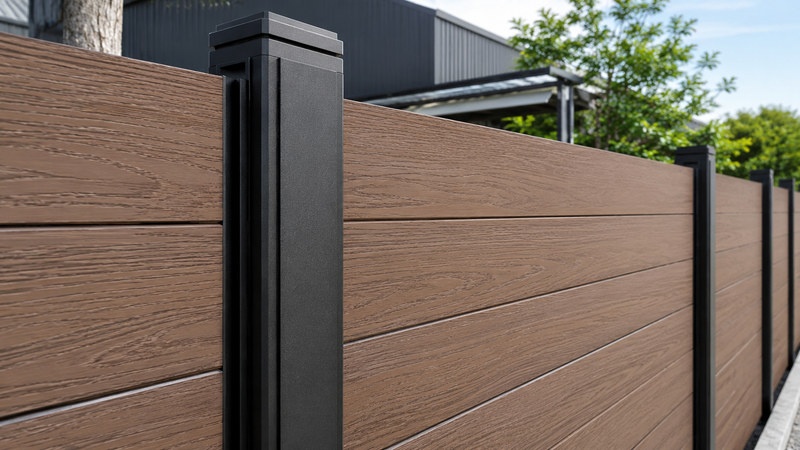
Two common installation methods are in-ground concrete fixing and surface mounting with base plates.
Step 1: Mark the Fence Line and Post Positions
Use a string line to mark the planned fence boundary.
Measure and mark the position of each post based on the manufacturer’s installation drawing.
Before installing the posts, check:
- The fence line is straight
- Post spacing matches the panel system
- Gates and corners have been accounted for
- The correct post type is used at each location
Check both the starting and ending points of the fence run.
Small measuring errors can become more noticeable across a long installation.
Step 2: Method 1 — Install Posts in Concrete Footings
In-ground concrete fixing is commonly used when composite fencing is installed on soil or other suitable ground.
The general process is:
- Mark the post locations.
- Excavate the required foundation holes.
- Prepare the hole bases according to the foundation design.
- Position the posts and check alignment.
- Brace the posts to prevent movement.
- Place concrete around the posts.
- Allow the concrete to gain the required strength before installing panels.
Foundation dimensions depend on soil conditions, frost depth, wind loads, fence height, and local requirements.
For some standard residential installations, guidance may specify post embedment depths in the region of 600–850mm. However, this range should not be used as a universal footing specification.
In cold climates, foundations may need to extend below the local frost depth.
For taller fences or exposed locations, the foundation may need to be larger or reinforced.
Step 3: Method 2 — Install Posts Using Base Plates and Expansion Anchors
For existing concrete surfaces, composite fence posts can sometimes be installed using metal base plates and suitable anchors.
This method is often considered for patios, concrete yards, and commercial paved areas.
The general installation process is:
- Check the condition and suitability of the concrete foundation.
- Mark the post and base-plate locations.
- Confirm that the anchor positions meet the required edge distances.
- Drill the fixing holes to the specified dimensions.
- Clean the holes according to the anchor manufacturer’s instructions.
- Install the approved anchors.
- Secure the base plate and post.
- Check the post alignment before fitting panels.
The type, diameter, embedment depth, and quantity of anchors must be selected for the actual loads and base material.
Do not assume that a thin patio slab or existing concrete surface can support a full-height privacy fence.
Step 4: How to Choose the Right Post Installation Method
The best method depends on more than installation convenience.
| Project Condition | In-Ground Concrete Posts | Base-Plated Posts |
|---|---|---|
| Soil or unpaved ground | Common option | Requires a suitable designed foundation |
| Existing concrete surface | May require excavation | Possible if the concrete is suitable |
| High-wind location | Requires structural assessment | Requires structural and anchor assessment |
| Tall privacy fence | Foundation must suit loading | Anchor and base design must suit loading |
| Installation work | Excavation and concreting | Drilling and anchoring |
JZH Fence Installation Insight: Choosing the Right Post Fixing Method
When reviewing a composite fencing installation, the first question should be what type of ground the fence will stand on.
A fence installed in soil requires a different fixing approach from one installed on an existing concrete slab.
For a typical residential project using a 1.8m-high WPC privacy fence, in-ground concrete posts may be considered where the boundary runs across soil.
On an existing concrete surface, a base-plated system may avoid excavation, provided the slab and anchors are suitable for the fence loads.
However, ground type alone is not enough to make the final decision.
Fence height, wind exposure, post dimensions, and gate loading must also be considered.
Our recommendation is to confirm the installation conditions before finalising the post configuration, rather than choosing the fixing method solely because it is faster or easier.
For B2B buyers, sharing site photos, fence dimensions, and ground conditions at the quotation stage helps identify potential installation issues earlier.
5. How to Install Composite Fence Panels Step by Step
Once the posts are securely installed and correctly aligned, you can begin fitting the composite fence panels.
The following process applies to a typical horizontal WPC board system using slotted posts.
Always follow the assembly sequence for your exact model.
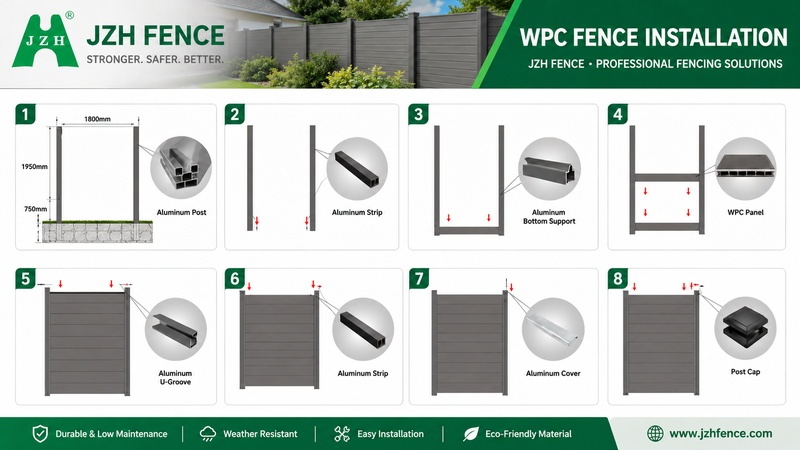
Step 1: Install the Bottom Rail or Starter Profile
Position the bottom rail between the posts according to the manufacturer’s drawing.
Check that it is level before securing it.
The bottom rail supports the first composite board and helps maintain a straight fence line.
Keep the required ground clearance to prevent prolonged contact between the boards and standing water.
Step 2: Slide Composite Boards into the Post Channels
Start with the first composite board.
Insert it carefully into the channels on both posts and lower it onto the bottom rail.
Make sure the board sits correctly before adding the next one.
Continue installing the boards one by one until the required fence height is reached.
For a typical JZH Fence 1.8m-high configuration, approximately 11 boards may be used, depending on the board profile.
Check the exact board quantity and effective installed height in your product drawing.
Avoid forcing boards into the channels.
If a board does not fit, stop and check the spacing, channel dimensions, and post alignment.
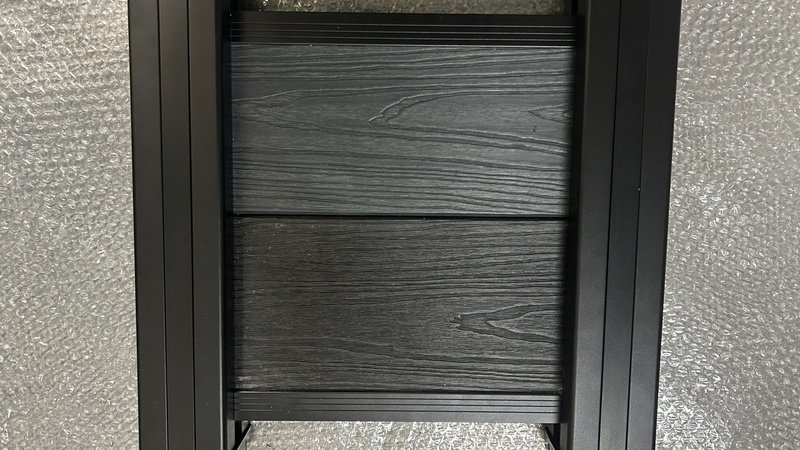
Step 3: Leave the Required Expansion Gaps
Composite fencing expands and contracts as temperatures change.
If boards are installed too tightly, expansion can place pressure on the boards or surrounding components.
The correct expansion gap depends on the material, board length, installation temperature, and fixing system.
For example, the Cladco Signature Composite Fencing Installation Guide specifies expansion allowances for its own fencing system.
These dimensions should not be copied directly to other manufacturers’ products.
For JZH Fence panels, use the expansion allowance stated in the installation drawing for the selected WPC system.
Step 4: Install the Top Rail and Post Caps
After fitting the final board, install the top rail or capping profile.
Make sure it connects properly with the posts and boards.
Fit the post caps and any finishing pieces supplied with the system.
Before finishing, check that:
- Boards are correctly positioned
- Rails and caps are secure
- Expansion allowances are maintained
- The completed fence line is straight
- No boards or accessories are damaged
6. Installing Composite Fencing with Existing Concrete Posts
Replacing old timber fence panels with composite boards does not always require removing the existing concrete posts.
However, the condition and dimensions of those posts must be checked first.
Check the Existing Concrete Posts
Inspect the posts for cracks, movement, and visible deterioration.
Measure the clear distance between each pair of posts.
Older fence installations may have inconsistent spacing, even when the panels appear identical.
Also check whether the existing foundations are suitable for the replacement fence, particularly if the new panels are heavier or create different wind loads.
Install U Channels or Compatible Adaptors
If the existing concrete posts are suitable, compatible U channels or adaptor profiles may be used to hold the composite boards.
Position the channels vertically and secure them using the fixings specified for the system and substrate.
Make sure both channels are aligned before installing the boards.
Fit Composite Boards and Finish the Panel
Install the bottom rail or starter profile, then insert the boards into the channels.
Leave the required expansion and drainage allowances.
Finish with the top capping profile.
If the existing posts are too narrow, incorrectly spaced, damaged, or structurally unsuitable, replacement may be the better option.
7. How to Install Composite Fencing on Slopes and Around Gates
Not every property has level ground.
Sloping terrain, corners, and gates often require adjustments to the standard installation layout.
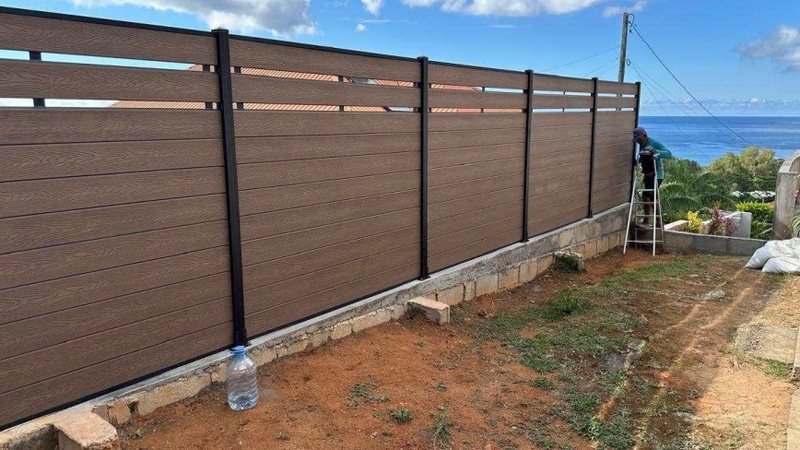
Stepped vs Raked Composite Fence Installation
Two common approaches are stepped and raked installation.
Stepped installation keeps each fence panel horizontal, with the panels installed at different heights as the ground level changes.
This can work well with rigid horizontal composite boards, although it may leave gaps beneath the panels that need to be considered.
Raked installation follows the slope of the ground.
It requires a fencing system designed to accommodate angled installation or suitable approved modifications.
Not every composite board system can be raked.
For many horizontal slot-in systems, a stepped arrangement is more straightforward, but the final choice should be based on the product design and actual slope.
Installing Composite Fencing at Corners
Corners require special attention because the boards meet at different angles.
Depending on the system, you may need a multi-channel corner post, purpose-made connectors, or an alternative approved arrangement.
Confirm the corner details before fixing the posts.
Trying to create a corner using unsuitable standard parts can result in poor connections and uneven panel alignment.
Installing Composite Fence Gates
Gates introduce additional loads to the fence structure.
Unlike standard fence panels, gates transfer forces through hinges and latches.
Before installation, check:
- Gate opening width
- Finished gate height
- Hinge and latch positions
- Required opening clearance
- Gate post reinforcement
- Foundation requirements
JZH Fence can supply matching composite fence gate solutions for project requirements.
The gate frame, posts, hardware, and foundation should be considered as a complete assembly.
8. Common Composite Fence Installation Mistakes and How to Avoid Them
Many composite fence installation problems can be prevented before the first panel is fitted.
The most important checks involve post spacing, vertical alignment, compatible components, and expansion allowances.
Mistake 1: Incorrect Post Spacing
Incorrect post spacing may prevent the boards from fitting into the installation channels.
If the posts are too close, boards may bind or need unnecessary cutting.
If the posts are too far apart, the boards may not have sufficient support or engagement within the channels.
Solution: Check the post spacing against the product drawing before securing the posts permanently.
Mistake 2: Posts Are Not Installed Vertically
A post that leans slightly may cause difficulties when fitting horizontal composite boards.
This problem can become more noticeable when installing several boards in the same panel.
Solution: Use a spirit level to check each post in two directions and brace it securely before the concrete sets or the anchors are tightened.
Mistake 3: Insufficient Expansion Gaps
Composite boards need room for temperature-related movement.
Installing them without the specified clearance may lead to pressure buildup, distortion, or damage.
Solution: Follow the expansion-gap requirements for the selected composite fencing system.
Mistake 4: Weak Foundations or Incompatible Accessories
An unsuitable foundation can affect the stability of the fence.
Likewise, using incompatible posts or rails may cause installation problems even when the boards themselves are correctly manufactured.
Solution: Confirm foundation suitability and component compatibility before starting.
JZH Fence Installation Insight: What to Check Before Fixing the Posts
One practical way to reduce installation problems is to check the fit between the composite boards and the posts before making the post positions permanent.
The nominal board length alone does not always tell you the correct post spacing.
You also need to consider the post channel depth and the expansion allowance required by the system.
For example, suppose an installer plans the post locations using only the nominal length of a composite board.
After the posts have been concreted into the ground, the installer may discover that the board does not fit correctly between the channels.
Correcting the issue may require cutting boards or repositioning posts.
A better approach is to confirm the complete assembly dimensions using the manufacturer’s technical drawing and, where practical, a trial fit.
This check is particularly important for contractors installing long fence runs with repeated panel sections.
Quick Troubleshooting Table
| Installation Problem | Possible Cause | Recommended Check |
|---|---|---|
| Boards do not fit between posts | Incorrect spacing | Check clear opening and post drawings |
| Fence panels appear uneven | Posts out of alignment | Check level and verticality |
| Boards become tight in warm weather | Insufficient expansion gap | Review system gap requirements |
| Posts move after installation | Inadequate foundation or fixing | Check structural design and installation |
| Top rail does not fit | Wrong accessories or incorrect board height | Check component compatibility |
| Gate does not close correctly | Post movement or poor hinge alignment | Inspect posts, hinges, and clearances |
For wholesalers and project buyers, requesting installation drawings before shipment can help installation teams prepare more accurately.
9. How to Maintain Composite Fencing After Installation
Composite fencing requires less routine maintenance than traditional timber fencing, but it is not completely maintenance-free.
Regular cleaning and inspections help keep the fence in good condition.
Cleaning Composite Fence Panels
Clean the composite boards with water, mild soap, and a soft brush.
Remove dirt, leaves, and organic debris before they build up around the lower sections of the fence.
Avoid harsh cleaning chemicals unless approved by the manufacturer.
If using a pressure washer, follow the product-specific cleaning guidance to avoid damaging the board surface.
Inspecting Fence Posts and Fixings
Check the posts, rails, caps, and exposed fixings periodically.
Look for loose components, visible movement, and damage following severe weather.
For gate installations, inspect the hinges and latches regularly because they experience repeated movement and loading.
Preventing Drainage Problems
Keep drainage paths clear around the base of the fence.
Where the system requires ground clearance, avoid filling the gap with soil or other materials that may trap moisture.
Proper drainage and correct installation can help reduce long-term maintenance problems.
10. Composite Fence Installation FAQs
How deep should composite fence posts be installed?
Post depth depends on fence height, soil conditions, wind loads, frost depth, and the selected post system.
Some standard residential systems use depths around 600–850mm, but this is not a universal requirement.
Always confirm the foundation design for your project.
Can composite fencing be installed on concrete?
Yes. Composite fence posts can be surface-mounted to suitable concrete foundations using approved base plates and anchors.
The concrete thickness, condition, edge distances, and anchor capacity must be checked before installation.
How far apart should composite fence posts be?
Post spacing depends on the panel dimensions and post profile.
Some composite systems use approximately 1.8m panel spans, but the correct centre-to-centre spacing can differ.
Follow the installation drawing provided for your exact fencing system.
Do composite fence panels need expansion gaps?
Yes, many composite fencing systems require expansion allowances because the material expands and contracts with temperature changes.
The required gap varies by product and installation method.
Can you install composite fencing on a slope?
Yes. Stepped installation is commonly used for rigid composite fence panels.
Raked installation may also be possible when the selected system is designed for angled installation.
Can composite fencing be fitted to existing concrete posts?
Yes, provided the posts are structurally suitable and compatible adaptors or channels are available.
Check the existing post spacing, condition, and foundations before installation.
Can composite fence boards be cut to size?
Many WPC composite boards can be cut using suitable woodworking equipment and a fine-tooth blade.
However, cutting may affect the required expansion allowances, supported span, or exposed ends.
Follow the manufacturer’s cutting instructions and use appropriate safety equipment.
Get Composite Fence Panels and Installation Support from JZH Fence
Successful composite fence installation starts with choosing compatible materials and confirming the installation details before work begins.
Whether you are replacing timber fencing, installing residential privacy panels, or supplying composite fencing for a larger project, the posts, panels, foundations, and accessories all need to work together.
JZH Fence supplies WPC composite fence panels, powder-coated aluminium posts, matching gates, and installation accessories for wholesalers, contractors, distributors, and project buyers.
We can assist with:
- Composite fence panel specifications
- Aluminium post and accessory matching
- Product drawings and installation guidance
- Colour and surface finish options
- Custom project requirements
- Bulk order quotations and export supply
If you are planning a composite fencing project, send us your required fence height, total length, preferred board style, and installation conditions.
Contact JZH Fence to request a quotation, product specifications, or installation drawings for your next composite fencing project.
In the Message field, include your destination, fence height, total length, gate requirements and ground conditions so we can review the fencing system and quotation scope.